
Just another day at work. There are five new and ongoing metal accessory projects visible in this picture, some completed and some nearly there. You will see them very soon. And I think you will like them. Very much.
Work in Progress


My new home studio and kiln room!
So, on top of making new dolls for the Vogue photo shoot next week, I'm also right smack in the middle of moving to a new place. My new work studio is pretty awesome, but it's been kind of ridiculous with everything happening at once. Timing is not ideal, but that's the only way we could meet the deadline. For the last two weeks I've going back and forth between the two places since my new studio is not set up yet, and I won't even get a chance to do it until after I get home from the shoot, because our last moving day also happens to be the day we have to catch our flight to New York. We'll just throw all our stuff in the new apartment and leave for the airport. Sort it out later. Sleep later too.
I'm pretty excited about the kiln room too. Having been a spacially-challenged city-dweller my whole life, I'm thrilled to finally have a room just for my kilns. Feels so decadent. Can't wait to try it, but in the meantime I've got some wigs to finish. I'm coordinating their colours to the product being advertized. Can't tell you what it is yet, but it's gonna be awesome!
The grinding chamber!

No, that's not a title of a campy horror flick, though blood does get spilled in there from time to time.
I finish my metal works in that invaluable little glass 'room', which contains the heavy dust and metal shavings until they get sucked up into the extractor. Before I got this baby, I would loathe the thought of doing metal finishing, as my desk and my whole studio would get very dirty and dusty, but since I got this chamber for my debris extractor, the cleanup is minimal and working conditions are safe. I love safety.
I bought the main plastic shell online, and then extensively customized it to fit my needs better, adding side walls and leather flaps. The problem is that it's plexy glass and it's starting to get really scratched up by all the high velocity debris flying around in there, and once it gets too cloudy to see through it, I'm going to have get a new one and customize it all over again.
Luckily my little grinding chamber still has lots of hours on it, which reminds me that I've gotta go back 'in there' and set some stones into the cone for the upcoming show doll in Berlin. Stay tuned for the pictures in a few days!
The Snow White candle photo shoot...
...was a little bit scary. It took us a whole day to get it right, and I was on edge the whole time, afraid that we were just one toppled candle away from a photo shoot of Snow White's funeral pyre.
Read MoreResin Doll In Lace
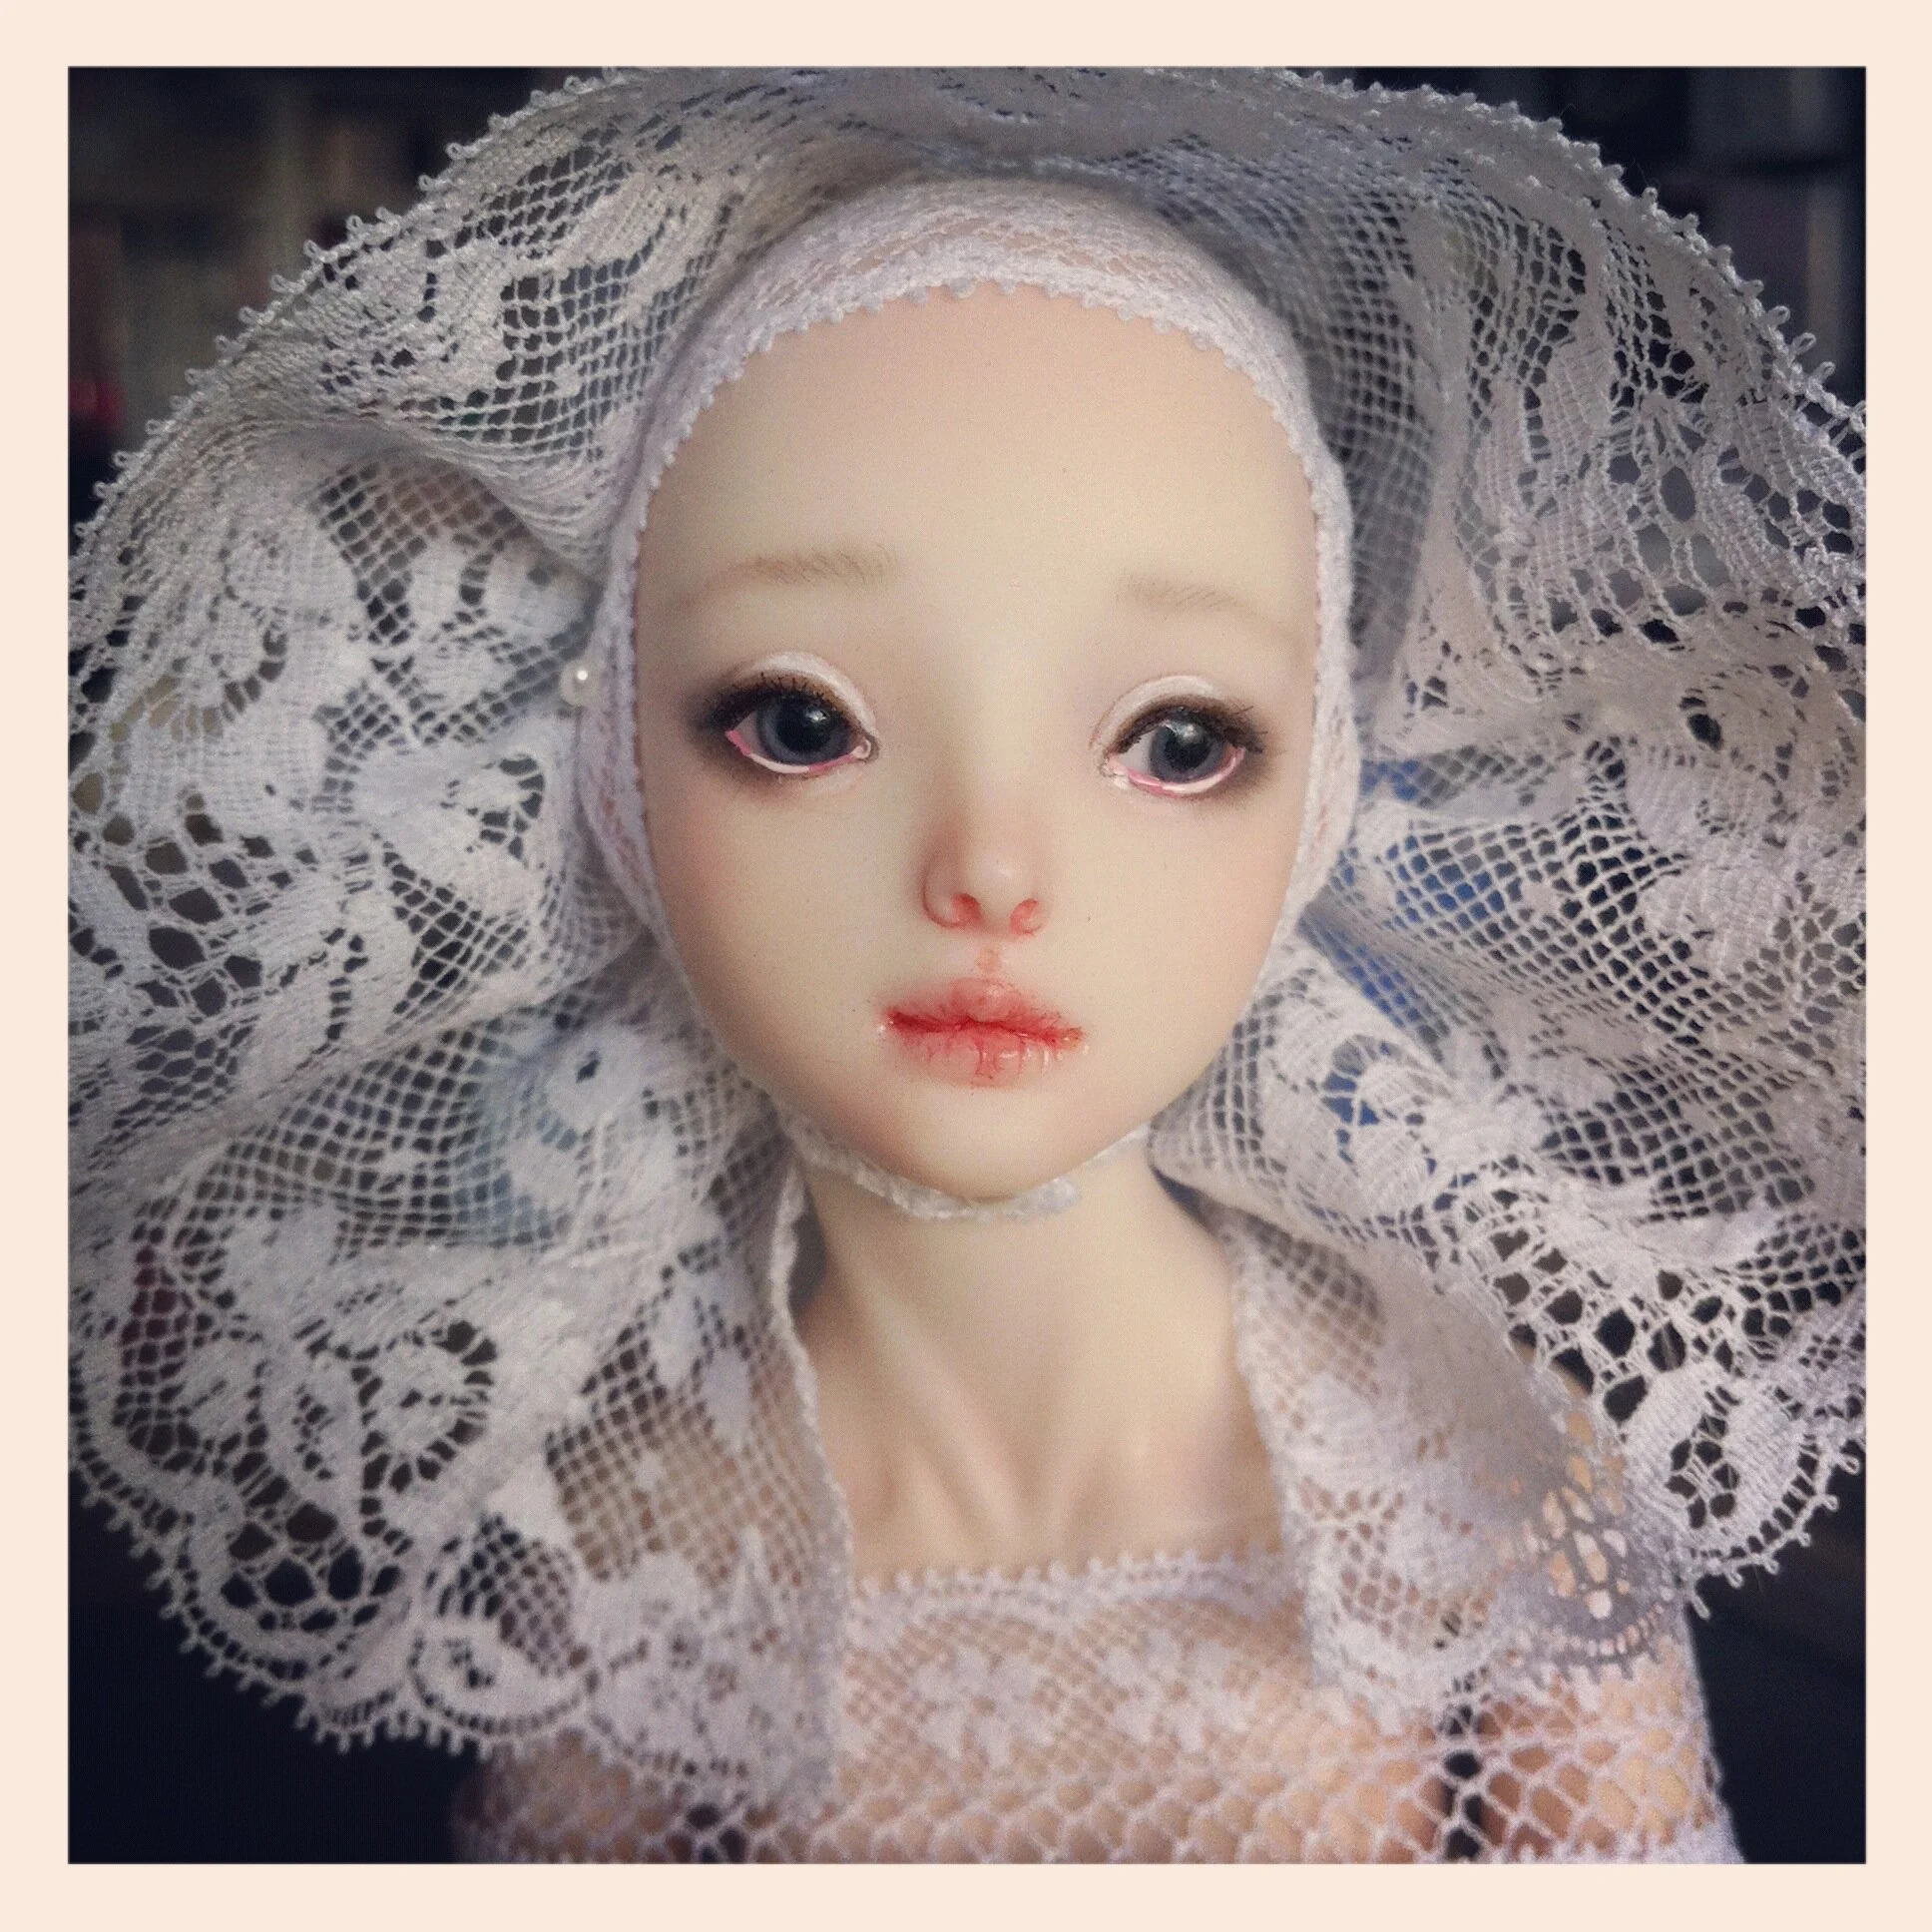
Just playing with some lace for fun. My favorite resin doll Luchia is wearing it. I was inspired by these awesome headdresses in a photo from an inflight magazine. Not sure what culture they are from. Maybe Norwegian...? Does any one know?

Help me name this resin doll
I'm running a bit late with the photo shoot of the first resin dolls, but it should wrap up tomorrow.In the meantime, help me name this pretty doll. I'd love to hear your suggestions on what she should be called.

Enchanted resin dolls have glass eyes
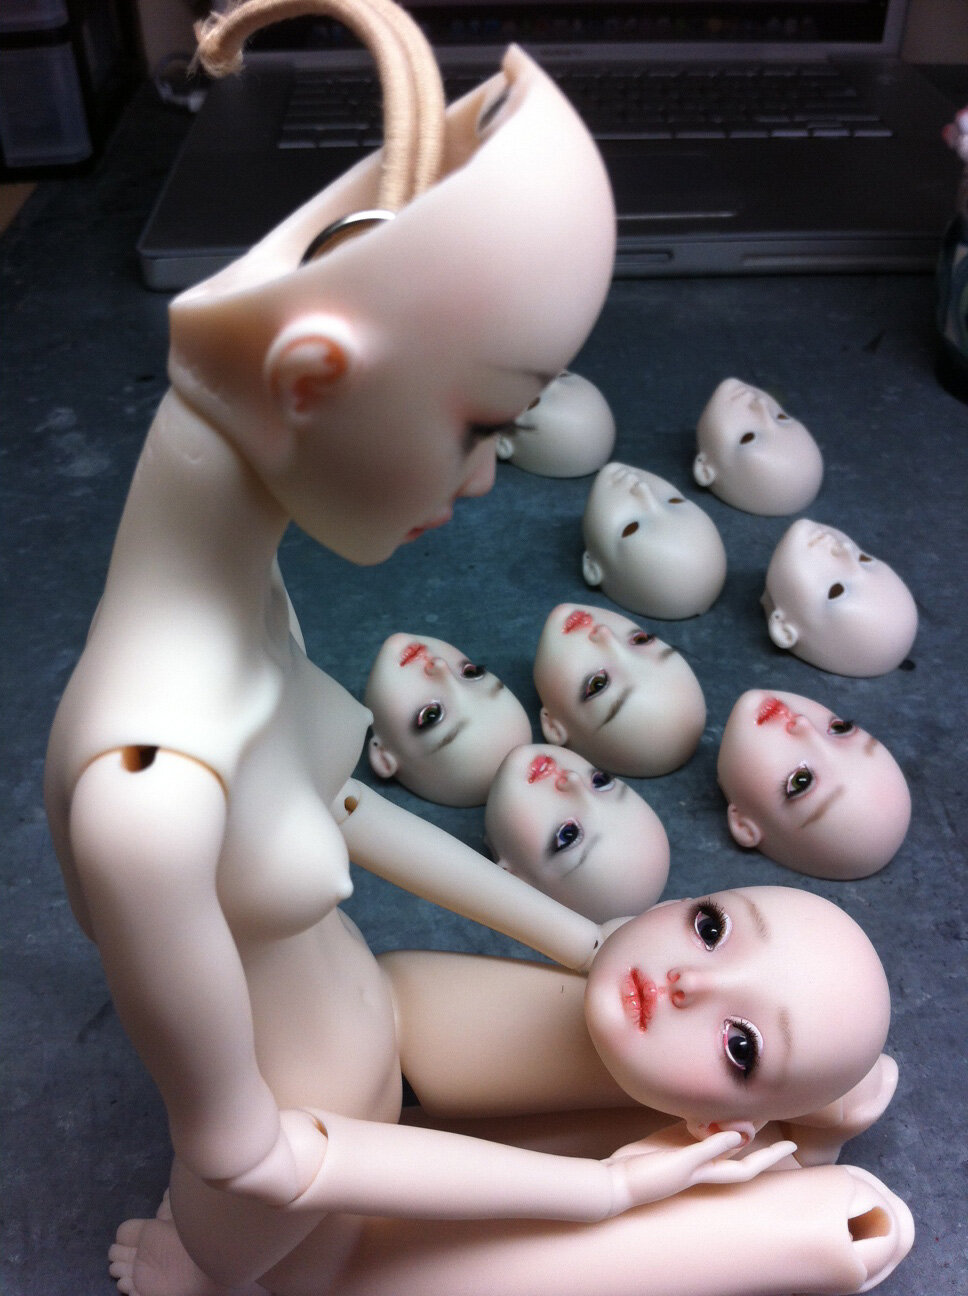
And tiny eyelashes!
At first I wasn't sure if I wanted to give my resin dolls glass eyes, but once I found the right kind of eyes, I was won over. This in turn, allowed me to give these dolls real eyelashes, something I've always wanted to do, but was unable to due to the shallow surface area of porcelain eyelids. The eyes are tacked on with a sticky gum inside, which means they can be changed fairly easily. The head cap is magnetic and the head is removable from the rest of the body. The doll is strung up with elastic and it articulates and holds poses very well. I am very happy with the quality of resin and the soft, satin glow of the skin.
Tomorrow I'll shoot all my newly painted resin dolls and show you all of it!
Painting Resin Enchanted Dolls

My set up is a lot different than what I would use for painting porcelain dolls; instead of china paint, I've got acrylic paints and pencils. It's weird. I am able to replicated a similar, airbrushed effect though. Still getting into my groove.
New Neck joint for Enchanted Doll
I made an alternate double neck joint for my Rubenesque model. It's another double joint I've been wanting to experiment with for a while now.
Read MoreHow to switch Enchanted Dolls' feet
A few days ago I announced that the upcoming edition of Echo dolls will have two interchangeable pairs of feet
Read MoreThe most beautiful porcelain hand I ever made!

I made this hand for my test doll. I'm convinced it's the most beautiful hand I ever made. You see, I don't just pull a hand out of the mold and fire it, I manually shape and sculpt it to make it more expressive. Unfortunately, expressive, tiny hands are virtually impossible to mold with the rigid plaster molding method. So, they have to be very simplified in order to be mold-able. Therefore, each hand undergoes significant re-sculpting and remodeling in the post-molding period.

I separate the fingers, define the knuckles and establish the bending angles on all the fingers. It's ridiculously tedious and I hate doing it, while simultaneously loving it. I estimate that it takes me 2-3 hours to make one hand from casting to painting, or 4-6 labor hours+ 12 kiln firing hours for a pair of hands for one doll.
This hand is the pinnacle of my achievement. Just wanted to share it.
Editing the Enchanted Doll book
in Book, Work in Progress
My editor is in the process of polishing up my writing for the book before it goes to print in two weeks. I took a day off molds in order go over the latest revisions she had sent me and spent most of it editing at my alternate (and rather comfortable) working station until my laptop got tired, said: "Adios Amigos!" and promptly crashed. Thank software engineers for auto-save. The deadline approaches...it's the nature of deadlines.
I love my job.

Molds-behind the scenes
Some more peeks of my current projects. Making more molds.

These shots were taken just this morning. So tired... I wish I could just go to sleep, but my mind is restless...13 hours spent in clay, water and plaster up to my elbows don't think I can stand the feeling of clay on my hands any more...skin is so dry and tight, I just want to jump out of it, like a lizard, God I wish I were done with this already but there are so many more...oh my god I hate making molds so very much alas, that's what it takes to make what I want to make and I will make it so help me god...at least I've got a few more episodes of the Tudors left why is the iPad screed so shiny and reflective? is my nose too long? why did Henry the 8th come to hate Anny Bolyn so much? did he really believe she was a witch? my fingers are so pruney I wonder how much water they can absorb before the skin starts falling off the bones... can that happen? if only this part would just set already so that I can take it out and clean up I should also sweep before I drag these plaster crumbs all over the place I really need to clean this place up, if only I were finished with these stupid molds already...I need some hand cream......man, my orange tree is going to freeze outside if it keeps getting colder, I wonder if I ought to pull it back in? I should stop dropping my flipflop every time I tuck my knee under so that the chair wouldn't roll over it and get stuck every time I move, and why do I have to tuck my knee under every time I sit down anyway? I, like, don't even notice how it happens...god, my knee is so sore I wish I would just stop doing that, when is this mold going to set already...?Ouch! pay attention when you're using dental tools if you want to keep all your fingers...perhaps a knife would be better to trim this seam...this towel is covered with clay I need a new one...Chad? Chad?! damn, he is wearing headphones in there...I'll have to put this down and hope it holds for a few seconds...ohh for crying out loud, that stupid flipflop!!......

Another Peek
This is a sketch I recently made for a doll-related project. I can't say which project or how it's relevant exactly, yet, but I'm very excited about it.
Read MorePeeks: Bead Embroidery
This is one of the projects I've been working on for a few months. Can't tell you what it's for yet, but soon you will see.
Read MoreNew Molds

Happy New Year, everyone!
I've had a great holiday, a wonderful end of 2011 and a fantastic beginning of 2012! I'm so excited about this year! With all the new things I'm working on, I can just feel how awesome it's going to be! I'm bursting at the seams with creative energy and can hardly contain myself.
The Enchanted Doll book is undergoing final edits and will be going to print in three weeks, on February 1st.I, in the meantime, have been sketching out new project ideas, creating rough machetes and making new molds. You know how much I like to keep things secret until they're finished and until I know 100% that the are going to work, but I'm very compelled to give you a few sneak peeks of what I've been working on. Perhaps I should. Perhaps I will...Alright, meet me here next week for some peeks.
Back to work now. Art can not wait to get made!
Buried Treasure
I buried a doll in sand today. Then I dug her up, pretending that I was finding a precious, lost relic.
Read MoreThe Enchanted Doll grand prize
..For the 2011 Birthday Contest Winner!
The grand prize doll Lily has been completed and will be shipped to its new owner this week. Amal, please let me know you're in town and confirm you shipping address.
This still frame animation depicts some steps in the painting process of Lily, showing how it starts out and it's final look, but there are other steps between the layers that aren't shown, such as firings, of course. This head was painted in 3 china layers and 3 kiln firings. You can see how each layer fades after each firing, and has to be built back up to gradually intensify. It's a one step forward, two steps back kind of process.
Due to the unique transparency and non-drying characteristics of china paint, which require multiple firings to set, the painting process is driven and defined by the two conflicting targets: To paint the doll in as fewer layers as possible to minimize the number of firings, while simultaneously achieving the ultimate feature shapes, vibrancy and depth of colors.
After years of practicing china painting, I've finally come up with a suitable analogy to describe its multiple characteristics: China paint is like watercolors because it’s translucent; like oil paint, because it doesn’t dry; like digital graphics, because all layers must be kept separated and like ceramic glaze, because it bonds only through kiln firing.
A completed doll face. This one is for you, Amal. Claim your prize!


How I made the Chandelier crown
This morning I was mailing out the gifts for the 2011 annual Birthday contest winners, and I realized that I hadn't yet announced the third contestant who had guessed one of my current projects!
Read MoreStitching bits of lace into a dress
Working on the skirt now....
Read More